

How to Use a VM Image in Data Sole Cloud
Data Sole Cloud allows you to upload your own compatible VM image and deploy it directly to your cloud infrastructure.
The process is simple: upload your VM image, configure your cloud resources, and deploy your server.
1. Sign In to Data Sole  Cloud
Cloud
Log in to your Data Sole Cloud Dashboard. If you do not already have an account, create one before continuing.
2. Open Templates
Once you are logged in, locate the navigation menu on the left-hand side of the dashboard.
Click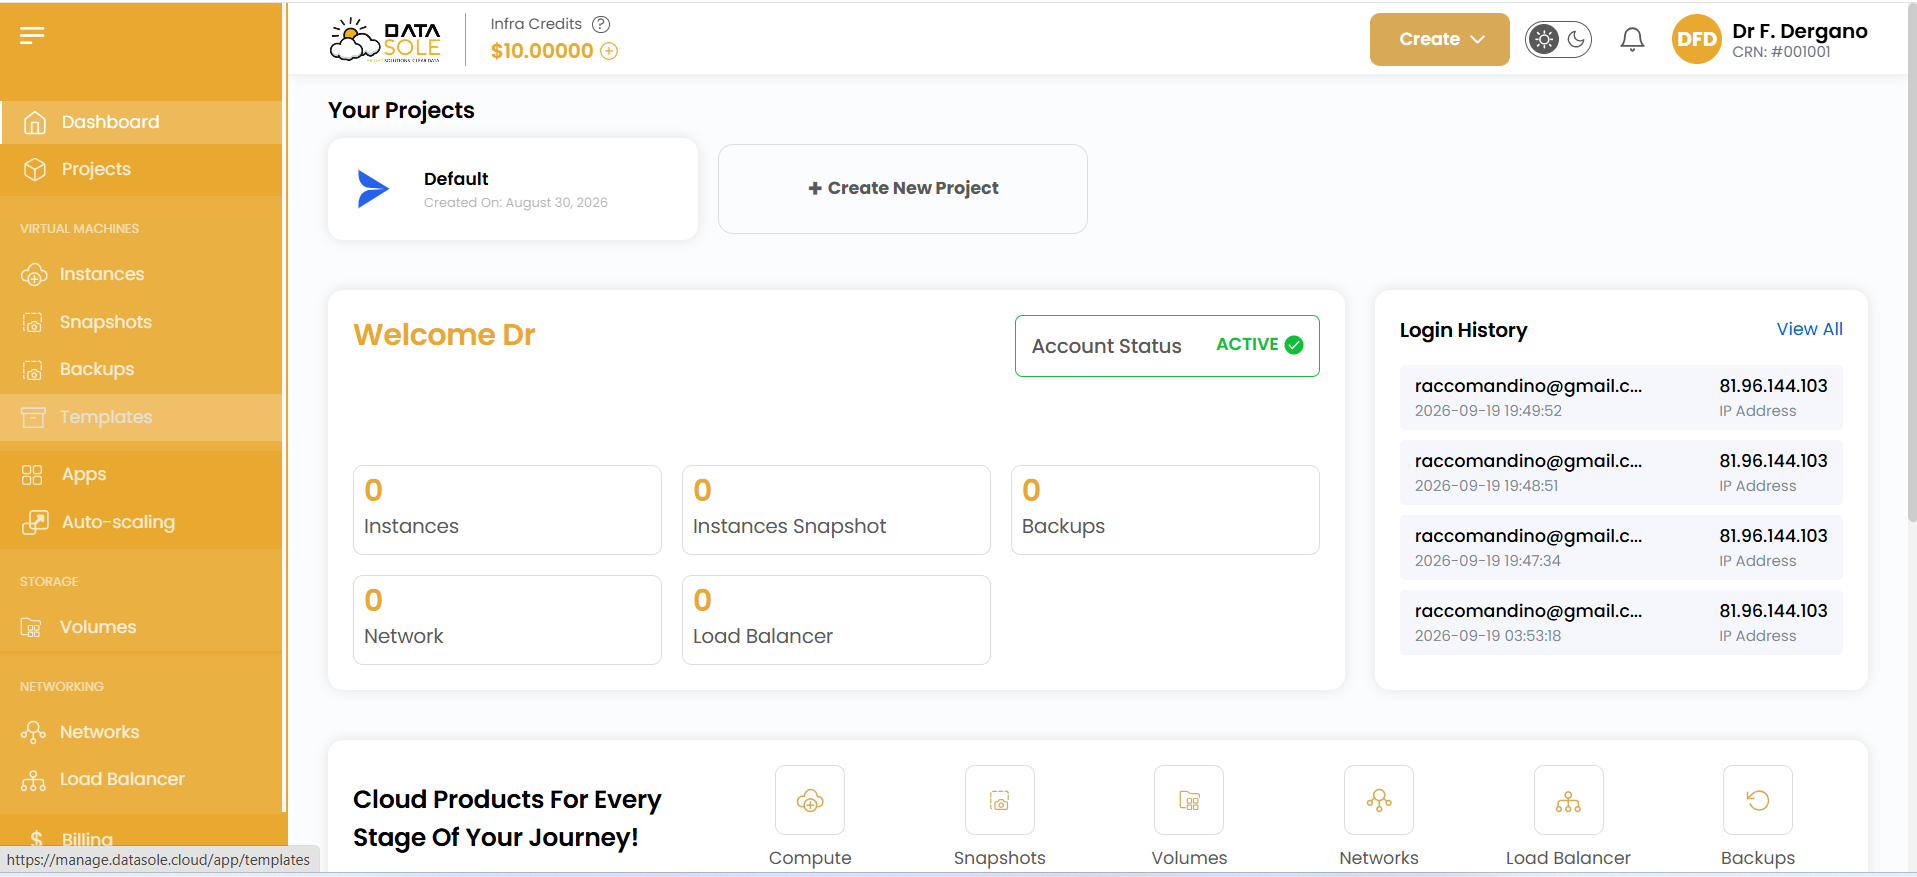 Templates.
This section allows you to manage VM images that can be used to deploy new cloud servers.
3. U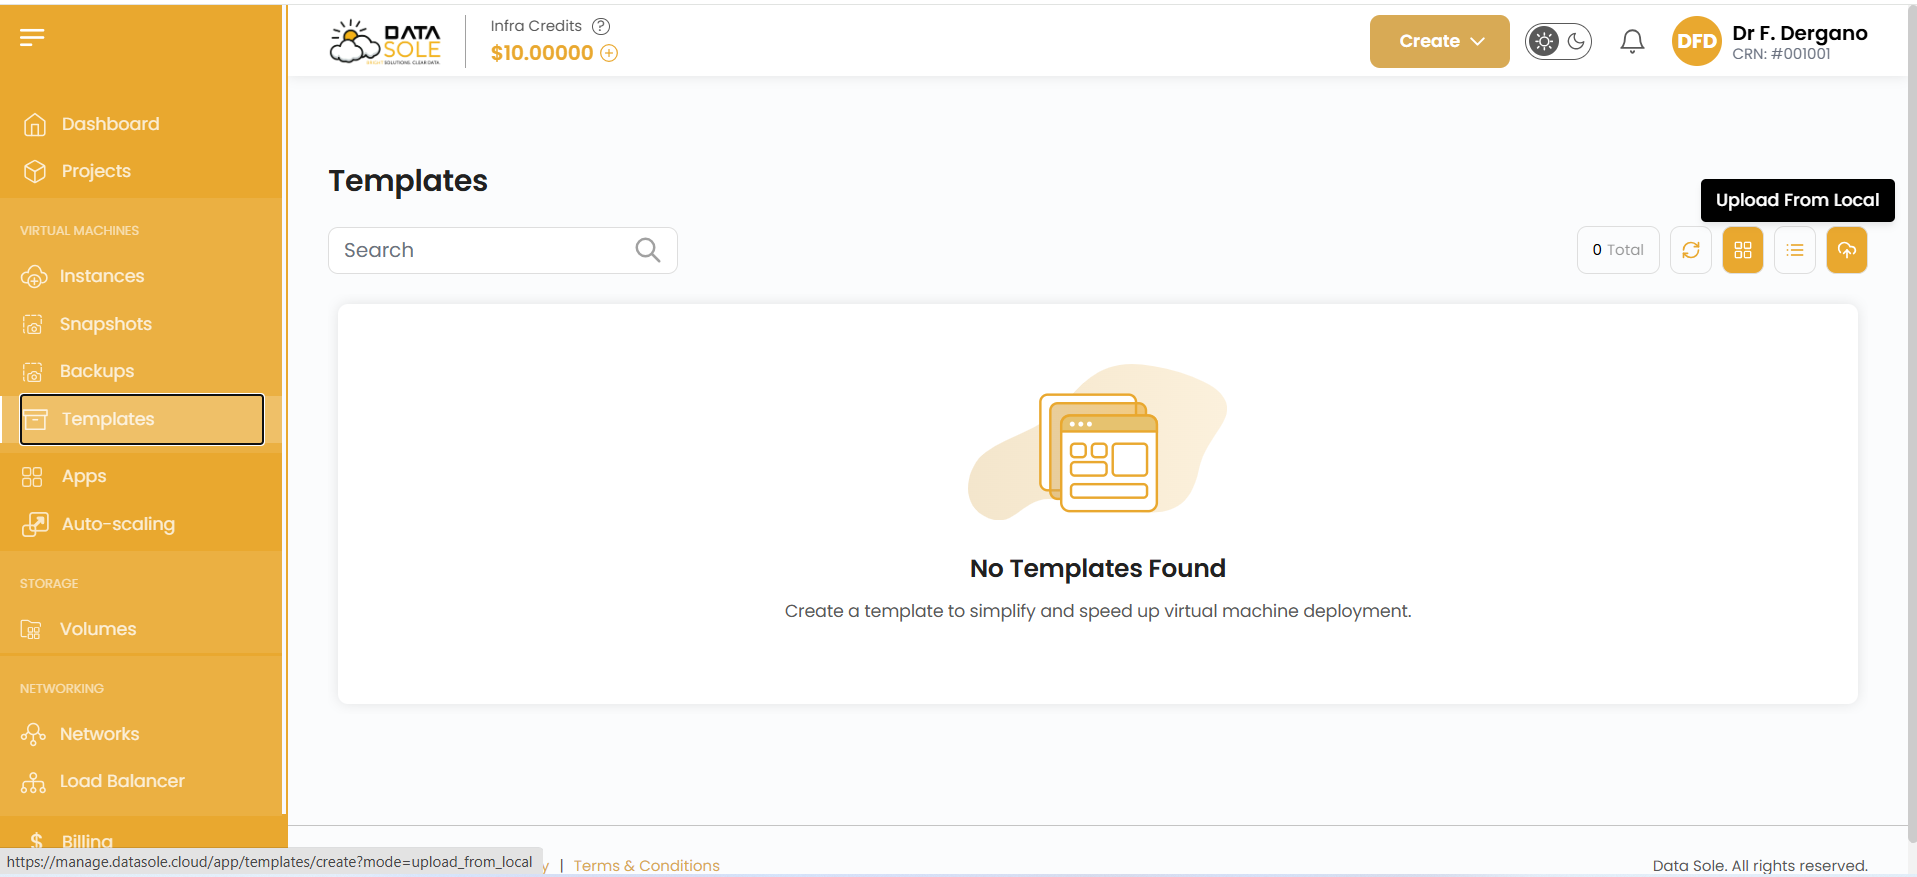 pload Your VM Image
From the Templates section:
- Select Upload from Local.
- Browse your local computer and select the VM image you want to upload.
- Select the uploaded VM Image.
- Review the image details.
- Click Confirm to complete the upload.
Wait for the image to finish uploading and become available in your Data Sole Cloud account.
4. Configure Your Cloud Server
Once your VM image is available, you can configure the cloud resources that will be used to run it.
Complete the deployment configuration in the following order:
Choose Location → Compute Offering → OS Disk Offering → Choose Network → Server Settings
Choose Location
Select the Data Sole Cloud location where you want your virtual machine to be deployed.
Compute Offering
Choose the amount of compute resources required for your VM, including the appropriate CPU and memory configuration.
OS Disk Offering
Select the storage capacity required for your operating system and workload.
Choose Network
Select the network that your virtual machine will use.
Server Settings
Configure the final server settings required for your deployment.
5. Review and Deploy
Once all configuration options have been selected, proceed to:
REVIEW AND DEPLOY
Review your VM image, location, compute resources, disk, network, and server settings.
If everything is correct, confirm the deployment.
6. Your VM Is Ready
Data Sole Cloud will automatically provision your virtual machine using the selected VM image and cloud configuration.
Wait a few moments for the deployment process to complete.
Once provisioning has finished, your VM image is deployed and ready to use in Data Sole Cloud.
Quick Deployment Process
Login / Create Account → Templates → Upload from Local → Select VM Image → Confirm → Choose Location → Compute Offering → OS Disk Offering → Choose Network → Server Settings → REVIEW AND DEPLOY → Ready to Use
Data Sole Cloud — Upload. Configure. Deploy.